How to Annotate Screenshots on Mac (2026 Guide)
You just spotted a UI bug — a misaligned button, a truncated label, a color that’s off by half a shade. You take a screenshot. Then comes the hard part: how do you actually explain what’s wrong?
Pasting a raw screenshot into Slack and typing “can you check this?” doesn’t cut it. Your teammate opens it, stares at it, and replies “which part?”. You end up on a call pointing at your screen anyway.
Annotating your screenshots — adding arrows, text labels, and highlights directly on the image — is the difference between feedback that lands and feedback that generates three follow-up questions. Here’s how to do it on Mac, from the built-in tools to a dedicated screenshot annotation tool that fits a developer workflow.
The Built-In Option: Preview and Markup
macOS has had basic annotation tools for years. The fastest path is the Markup toolbar in Preview:
- Open your screenshot in Preview (it should open by default when you double-click a PNG).
- Click the toolbox icon in the toolbar to reveal the Markup tools.
- Use the shape tools to add arrows and rectangles, or the text tool to drop in a label.
- Save as a copy so you don’t overwrite the original.
You can also reach Markup directly from a fresh screenshot. Press Cmd+Shift+5, capture your screenshot, and click the floating thumbnail before it disappears. That opens a quick Markup editor where you can sketch before the file even saves.
This works fine for one-off annotations. The limitations show up fast when you need to do this regularly: there’s no way to blur sensitive content, no way to manage a batch of annotated screenshots in one place, and no way to attach a comment or context alongside the image.
Third-Party Options
Several apps fill the gap. The most common ones developers reach for:
- Skitch — Evernote’s annotation app. Simple, fast, but development has stalled. Still works, but feels dated.
- CleanShot X — Polished screenshot tool with annotation built in. Subscription-based. Great for designers, overkill if you mostly need to communicate technical feedback.
- Annotate — App Store utility. Does the basics. No feedback workflow.
All of these treat annotation as the end goal. You annotate, export, then figure out how to share the result and track whether anyone acted on it. For casual use that’s fine. For a team shipping software, you want the annotation tied to the feedback — organized, searchable, and routed to wherever your team actually works.
A Better Workflow: Annotate, Comment, and Track Together
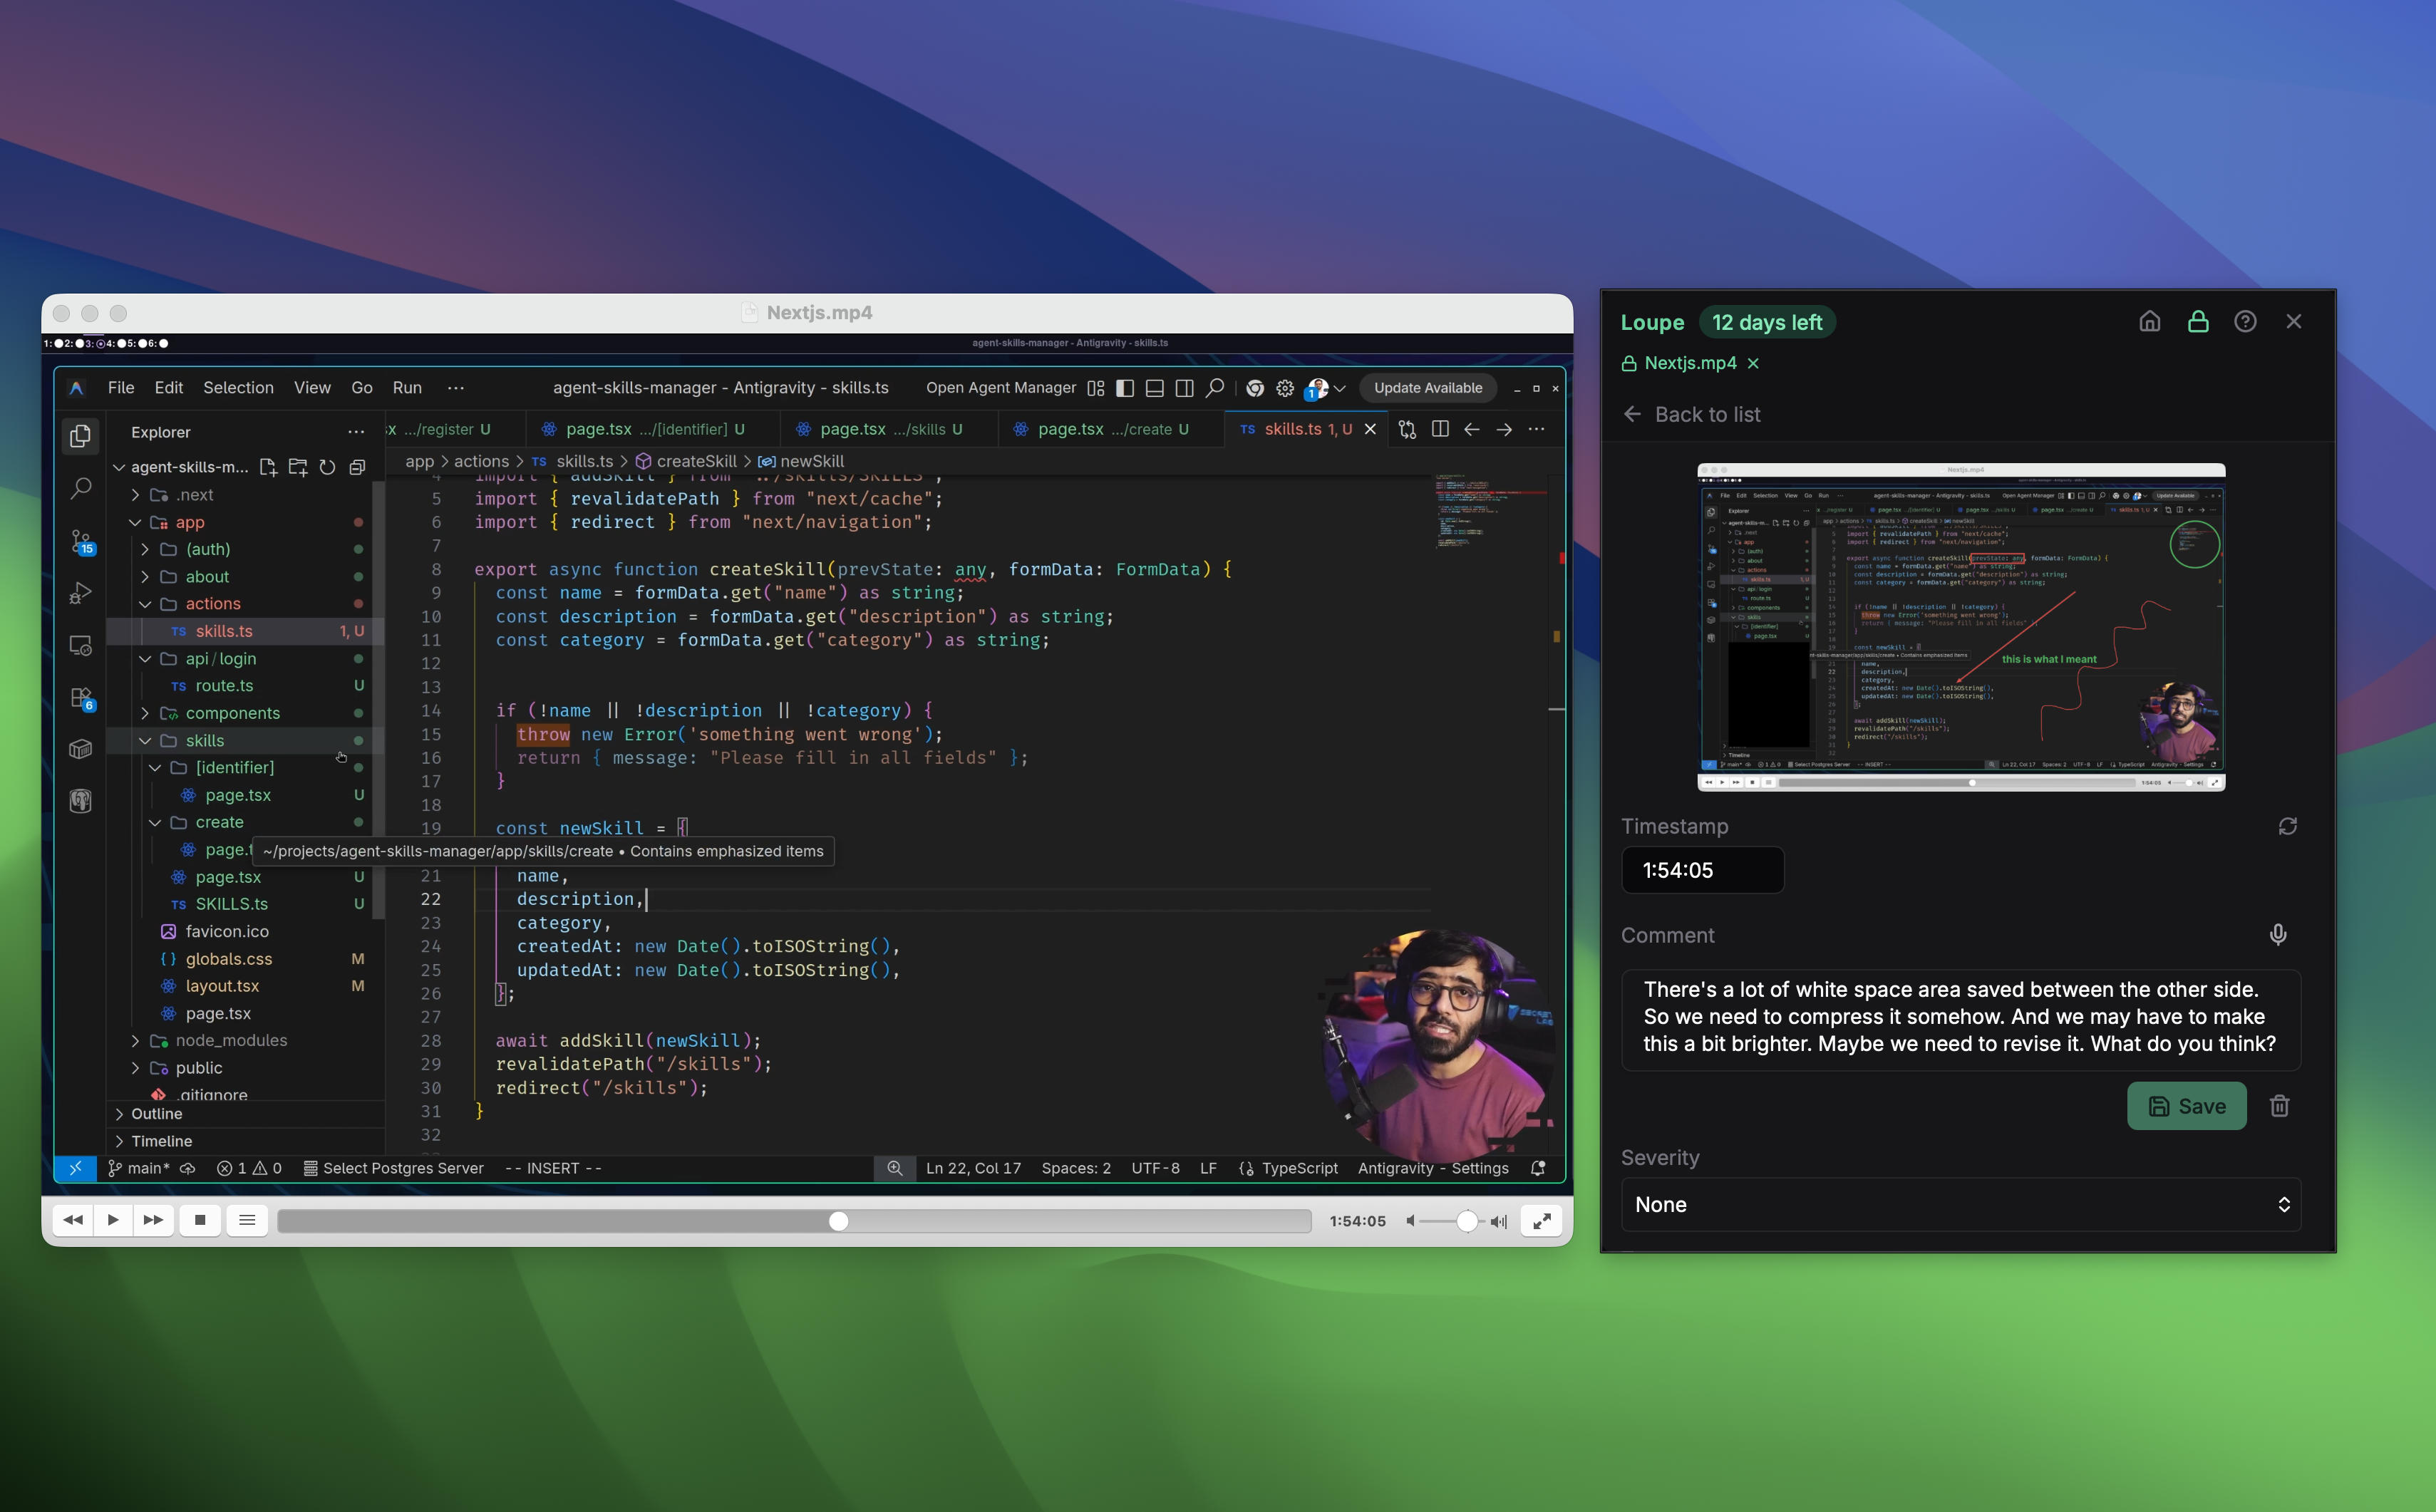
Loupe is a Mac desktop app built around exactly this problem. Instead of treating screenshots as standalone files, it ties annotation to structured feedback: each screenshot becomes a feedback item with an annotation, a text comment, and a severity rating — all in one place.
Here’s how annotating a screenshot actually looks in Loupe:
1. Capture a Screenshot
Press the Loupe keyboard shortcut (configurable, defaults to a global hotkey) from any app. Loupe captures whatever’s on screen and adds it to your current feedback session as a card. The screenshot is stored locally — nothing leaves your machine.
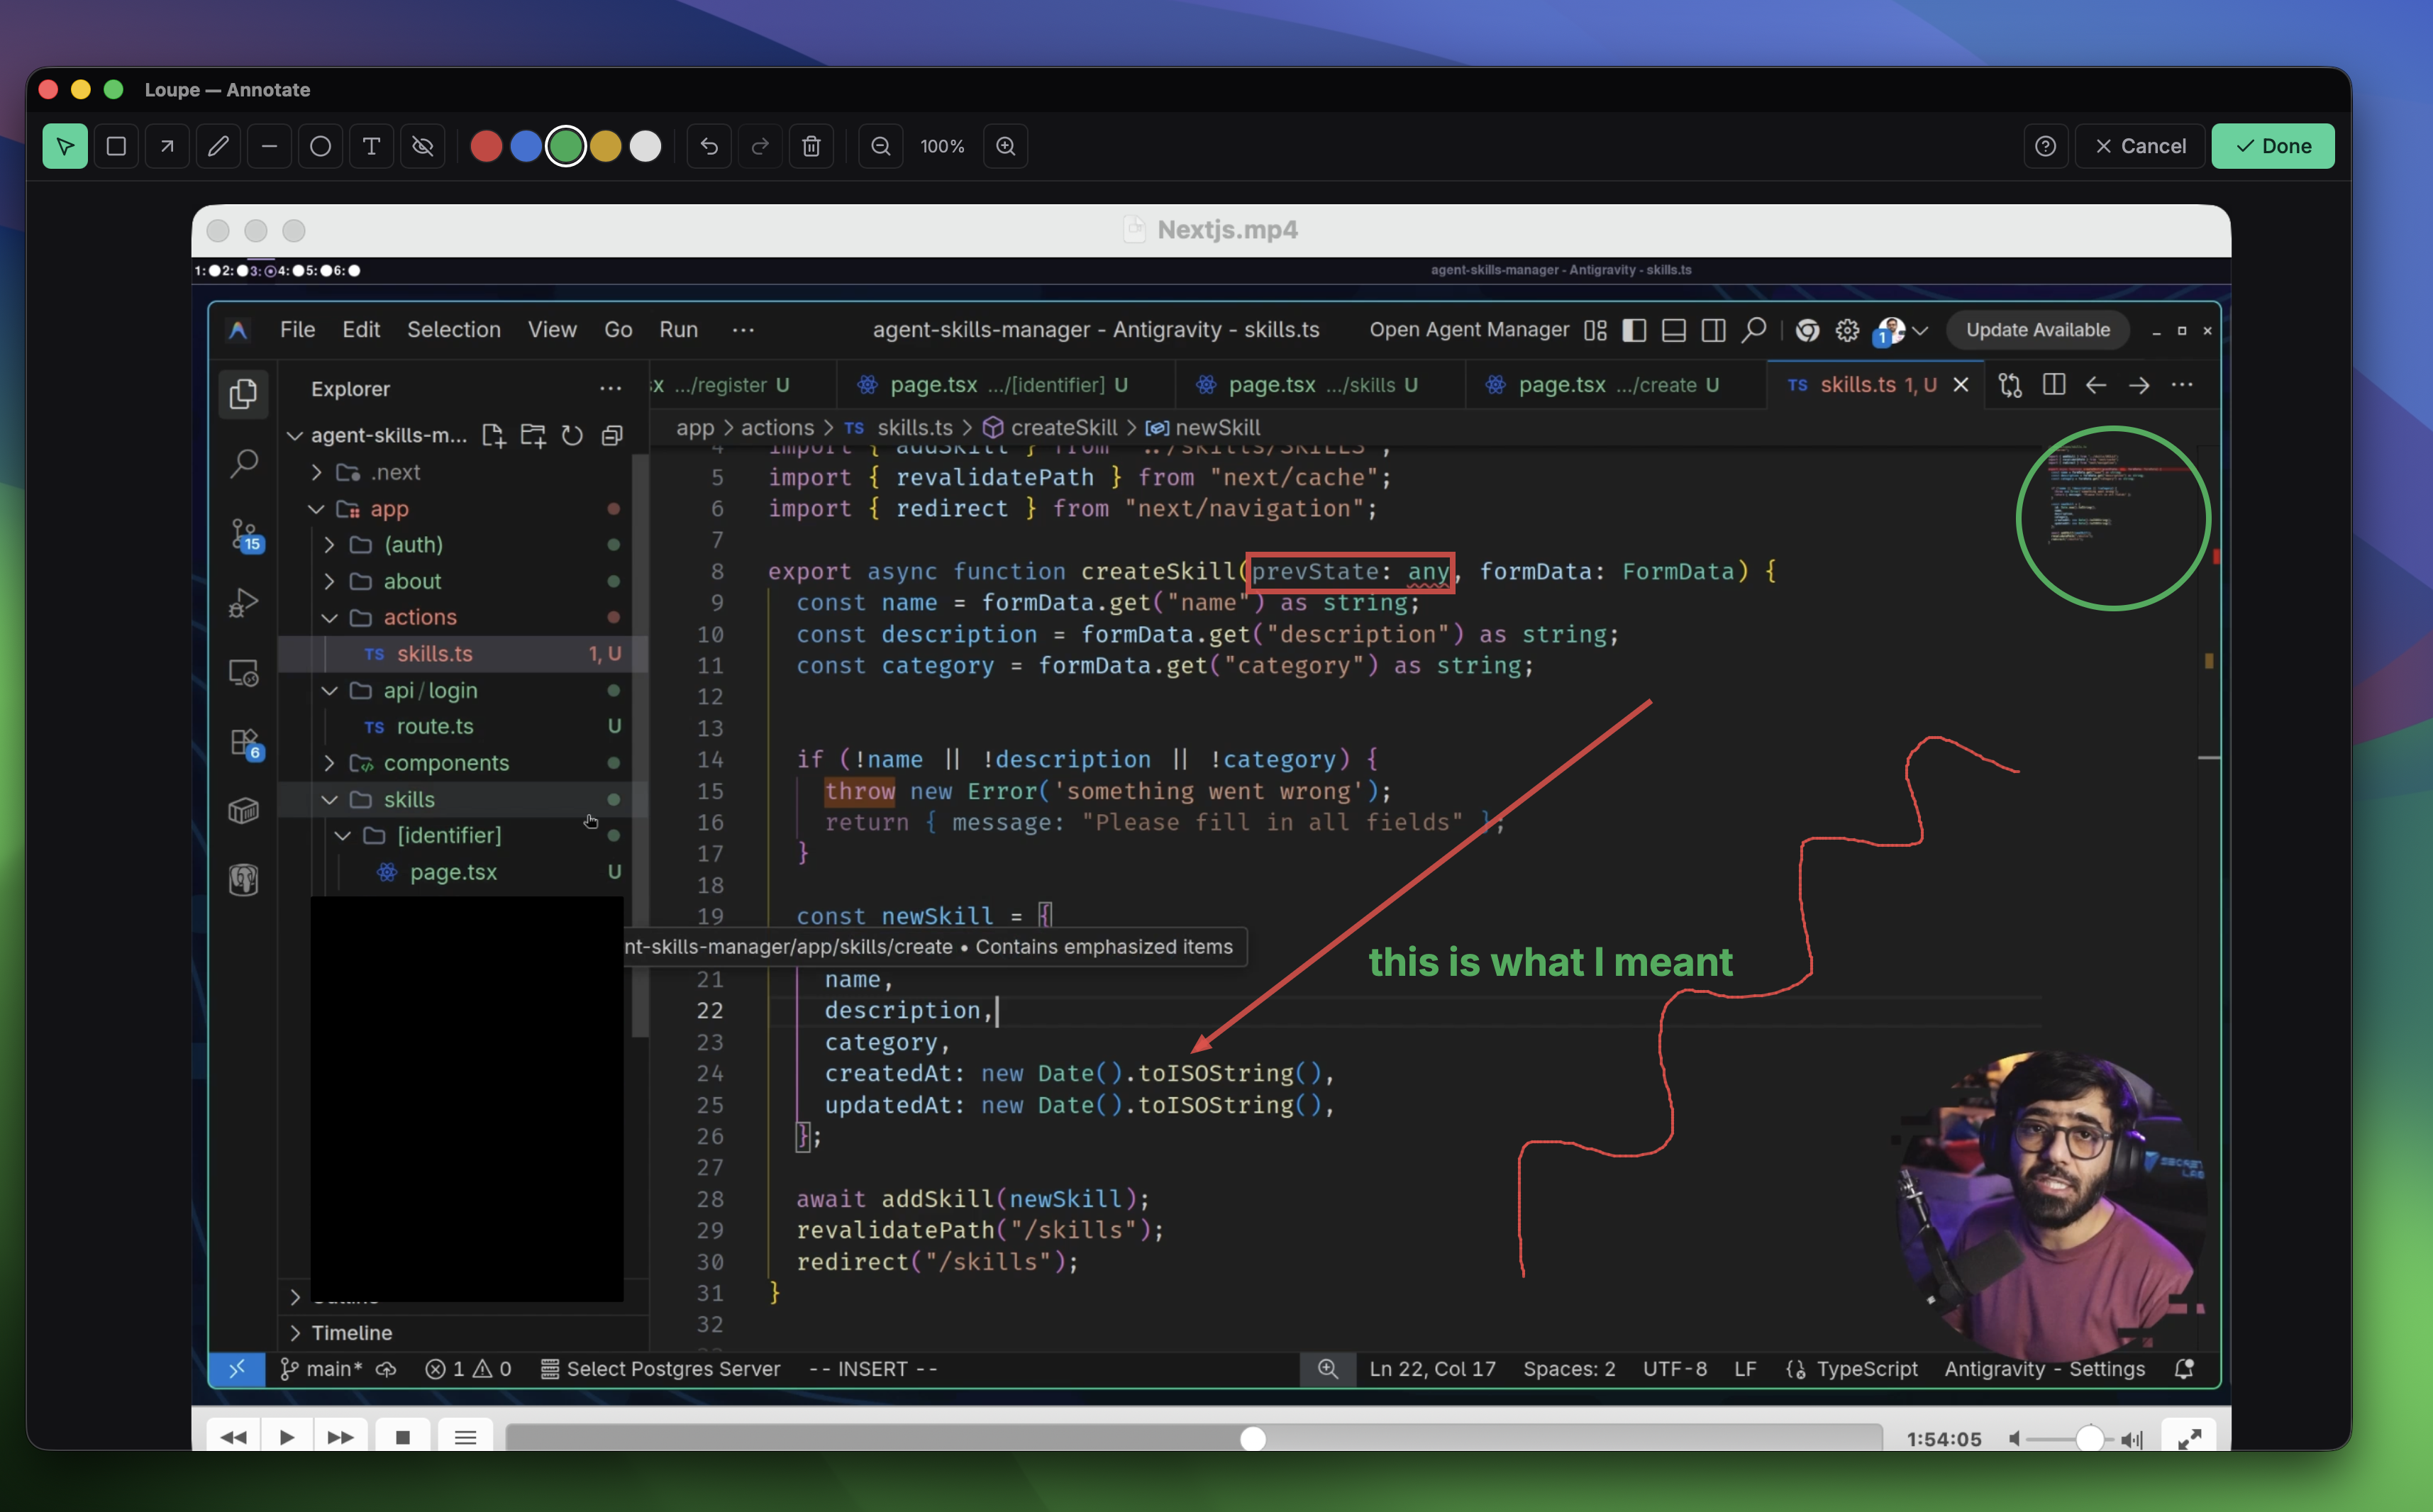
2. Open the Annotation Editor
Click the screenshot in the Loupe overlay to open the full-size annotation editor. This is where you draw directly on the image. The toolbar gives you:
- Arrows — point exactly at the element causing the problem
- Rectangles and circles — highlight or outline a region
- Text labels — add a note pinned to a specific spot on the image
- Freehand drawing — sketch a quick shape when precision doesn’t matter
- Blur / redact — cover sensitive data (user emails, tokens, PII) before sharing
Annotating a screenshot takes about 15 seconds. Draw an arrow to the broken element, drop a text label that says “this button clips at viewport widths below 1024px”, done.
3. Add a Comment
Back in the feedback card, type a comment to give the annotation context. Or use voice: Loupe records your mic and transcribes in real time using on-device AI, so you can speak the feedback while you’re looking at the screen. The transcript drops into the comment field automatically.
The annotation shows where the problem is. The comment explains why it matters and what needs to change. Together, they eliminate the back-and-forth.
4. Share or Export
Loupe syncs your feedback to a web dashboard where your team can view, triage, and assign items. It also integrates with Linear and GitHub — you can push an annotated screenshot directly to a Linear issue or GitHub issue without leaving the app.
If you prefer a document, export the session as a PDF. Each item gets a page: the annotated screenshot, the comment, severity, and metadata. The kind of report you’d be proud to send a client or include in a design handoff.

When to Use Which Tool
The right tool depends on what you’re actually doing:
- Annotating a screenshot to share in a DM right now — Preview Markup is fast enough. Open, draw, cmd+S, paste.
- Annotating screenshots for design review or QA feedback — a dedicated screen annotation tool saves time. Annotation alone isn’t the bottleneck; tracking and routing the feedback is.
- Running a structured review session with multiple screenshots — you want Loupe. Capture everything, annotate each item, push the batch to Linear or export as a PDF.
The Part No One Talks About
The real cost of bad screenshot feedback isn’t the annotation step — it’s what happens after. Someone gets a raw PNG in Slack, isn’t sure what they’re looking at, asks for clarification, loses the thread, and the issue shows up again two sprints later because no one tracked it.
Annotating your screenshots is the easy part. Connecting the annotation to the actual work — a Linear issue, a GitHub comment, a PDF in the client folder — is what turns a screenshot into a resolved bug.
That’s what Loupe is designed for. If your team reviews UI, reports bugs, or gives design feedback more than a few times a week, the workflow pays off fast.
Try It
Loupe is a native Mac app (also available on Windows and Linux). Free tier with GitHub Issues, no credit card required. Pro is $39/month — flat, no per-seat fees, cancel anytime.
Download Loupe and start annotating screenshots the right way.
Try Loupe free for 14 days
Download Loupe and start giving frame-precise feedback today. No credit card required.
Download Free Trial